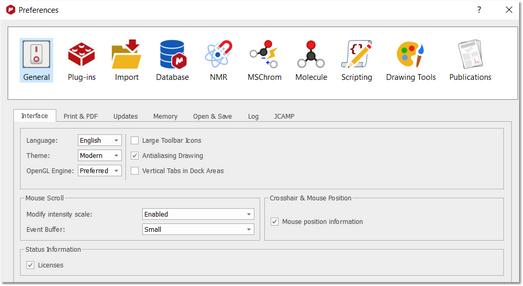
Preferences


Preferences |
|
|
Following the menu 'Edit(or File)/Preferences' ('MestReNova/Preferences' in Mac), you will be able to change the options of the Mnova interface, plugins, NMR. mass, molecule, scripting and drawing tools.
To keep the preferences in your registry, just click on the OK button. Once you have them in your registry, you can export them by using the Save button, which includes a scroll down menu to export all settings as an .ini file.
From the General Preferences, you will be able to choose between large or small toolbar icons.
'Antialiasing': This is the technique used to minimize the distortion artifacts known as aliasing when representing a high-resolution signal at a lower resolution. Aliasing is an effect that causes different continuous signals to become indistinguishable when sampled. Aliasing also refers to the distortion or artifact that is caused by a signal being sampled at high resolution (on the spectrometer) and then rendered on the PC video-display at lower resolution. The 'Antialiasing' is checked by default in Mnova. Vertical Tabs in Dock Areas: it will display the tabs vertically in the dock widgets (useful when having a lot of dock widgets opened in the lateral dock and most of the tabs displayed horizontally are not visible):
Language: Chinese, English, Japanese, Russian and Spanish versions of Mnova are currently available.
Theme: it will allow you to select between the ribbon interface (modern) or the classic one.
OpenGL Engine: These libraries will be used by the 3D molecule panel. The options are listed below: •Preferred: It's the default, leaves Qt to choose one in behalf of you. •Native: It uses the native OpenGL Windows drivers (It usually means the drivers provided by the graphics card vendor and hardware accelerated) •ANGLE: It uses the ANGLE - Almost Native Graphics Layer Engine which is a engine which translates OpenGL ES API to DirectX (usually better supported). •Software: It uses a Qt's software implementation of OpenGL.
Mouse Scroll: The 'Modify Intensity Scale' enables/disables changing the spectra intensity/threshold via the mouse wheel. It also allows to enable it but requiring that the Alt key is pressed. The 'Event Buffer' will only affect to high sensitive mouses/trackpads (Like the magic mouse and magic trackpad from Mac) in any other device the change of this setting won't affect. It sets the event buffer size (or even disable it).
Check the license box to display the licenses status information in the right down corner of Mnova GUI.
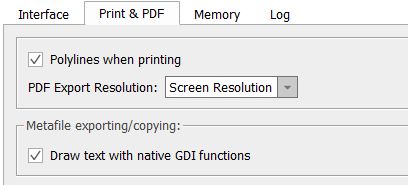
Print&PDF Exporting: From here you can select the PDF export resolution or the use of polylines when printing.
Metafile exporting/copying: By default the option is checked and the text will be drawn by the GDI+ engine natively as text. If the option is unchecked then the GDI+ engine will draw the text as paths. The differences between both options are: With the native text drawing option, the resulting metafile could be slightly different from what you see in Mnova due to differences on how GDI+ renders text. With the other option, the text should be shown exactly as Mnova shows, but the texts objects in the metafile aren't no more text objects, they are vector graphics objects, so user couldn't edit the text by typing/deleting characters
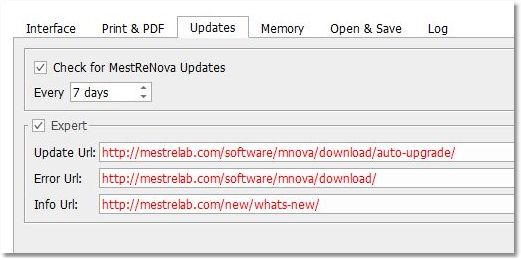
Updates: Use this dialog to select the interval to check for the new Mnova updates.
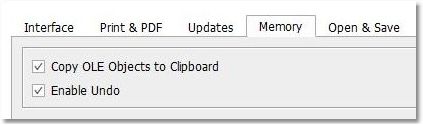
Memory: If you work with huge datasets, in order to avoid memory issues, you can uncheck the memory options to be able to copy your spectra to clipboard or to disable the Undo feature.
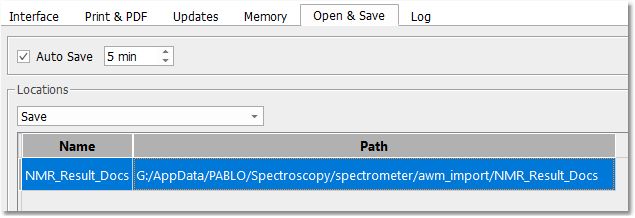
Open&Save: to set one or more locations as default open/close directories. A document can be saved as pdf in one of these default directories (via 'Save As' and choosing the pdf filter). The default open and save directories can be accessed via File/Open from Location and Save to Location.
From here you could also select the 'Auto Save' interval. By default Mnova will create save documents every 5 minutes and keep them at the %APPDATA%\Mestrelab Research S.L\MestReNova\AutoSave folder.
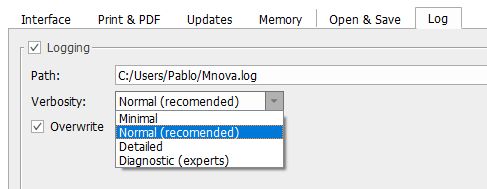
Log: to specify the log file and log's level:
•Minimal -lv 1 - messages(-1), errors(0) •Normal (recommended) -lv 2 messages(-1), errors(0), warnings(1) •Detailed -lv 3 messages(-1), errors(0), warnings(1), info(2) •Diagnostic (experts) -lv 4 messages(-1), errors(0), warnings(1), info(2), debug(3).
This option is disabled by default:
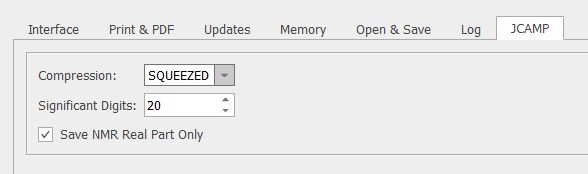
JCAMP: options to save the datasets as JCAMP format:
The format "PACKED" to save the data points in JCAMP was added as defined in JCAMP 4.24 section 5.2. This format will not compress the data, it will save the data points as text so the resulting file will be bigger than using the "SQUEEZED" format but, keeping the original dynamic range between saves.
You can decide the real point precision (by default 20) when saving the file with the capability to save or not the NMR Spectra as real only (by default true).
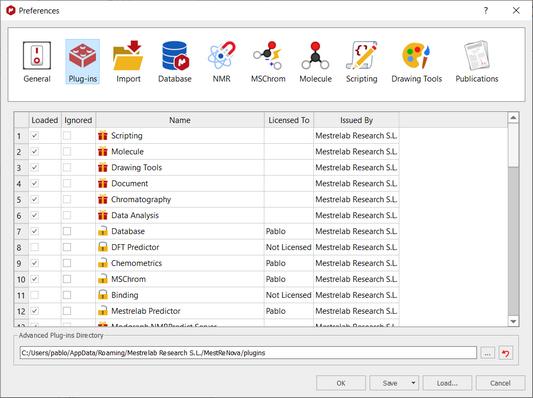
From the 'Plugins Preferences' dialog box, you will be able to ignore any plugin, which will be very useful in the case of concurrent (floating) licenses, in order to 'liberate' the license of those plugins which will not in use.
In any case, please bear in mind that Mnova allow users to only take the plugins they are using as opposed to the plugins which are installed.
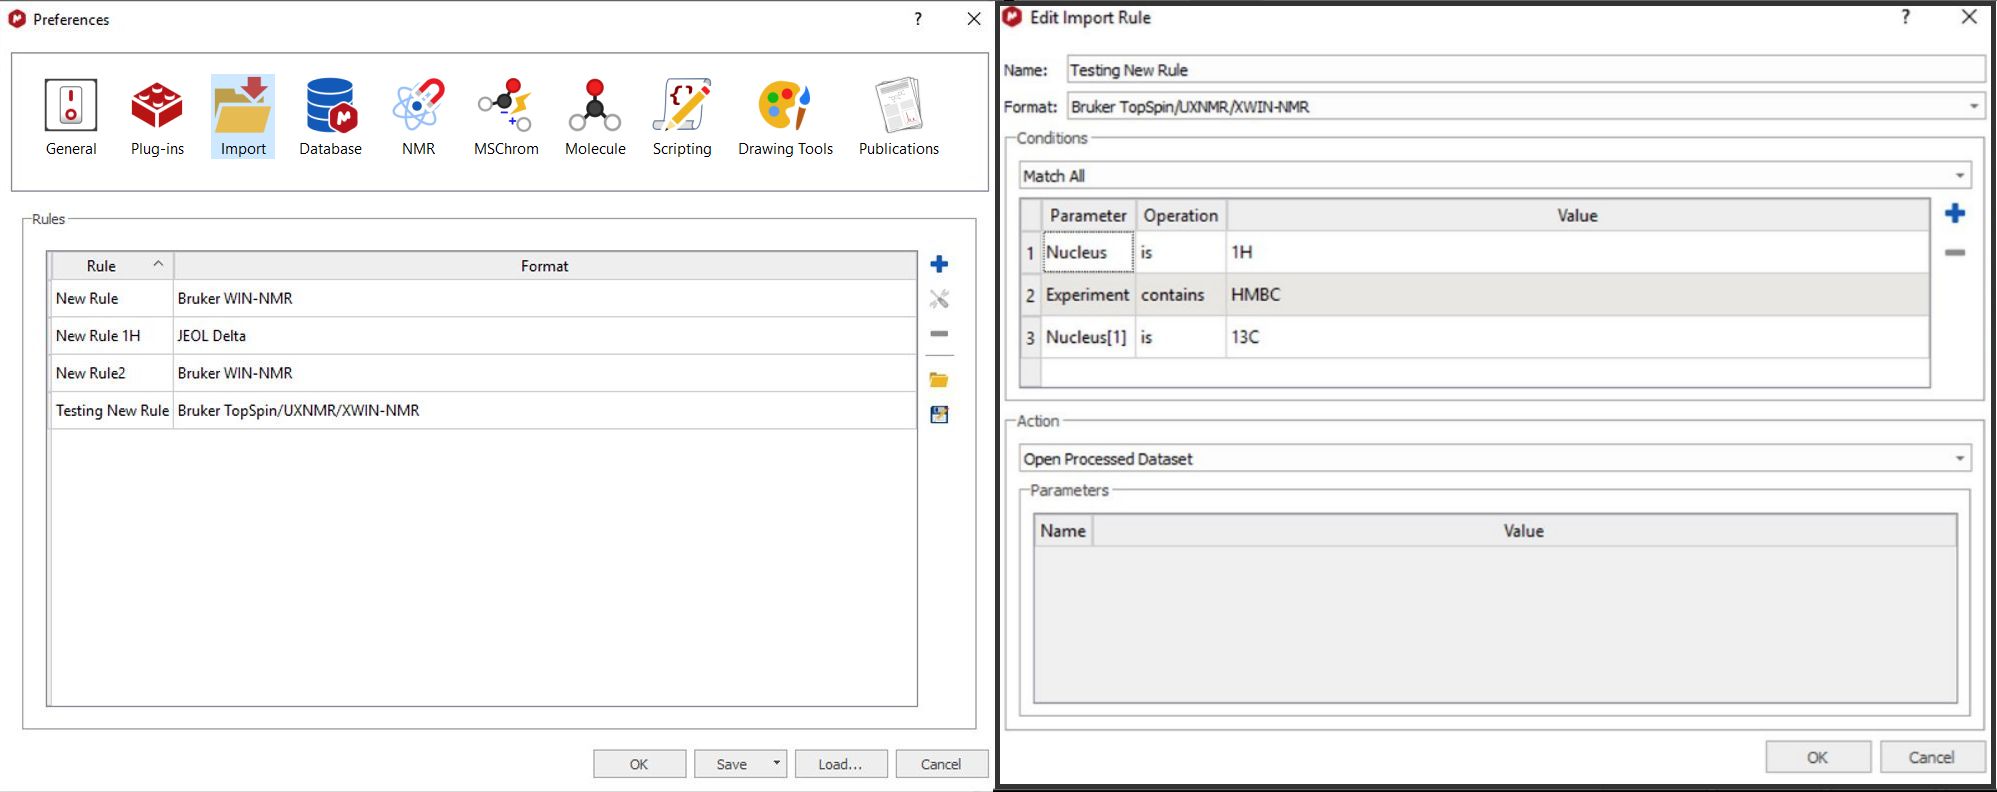
Click on the 'Import' button to select the desired options to load your processed NMR spectra (1r, 2rr, etc) instead of raw datasets (fid, ser, etc) or even the time domain raw data (original FID):
When adding a rule, you can set condition(s) in order to make an action. This condition(s) can be “match all”, “match any” or “match none”. By default “match all” is selected.
You will have the option to apply a processing template after having loaded the processed NMR spectrum.
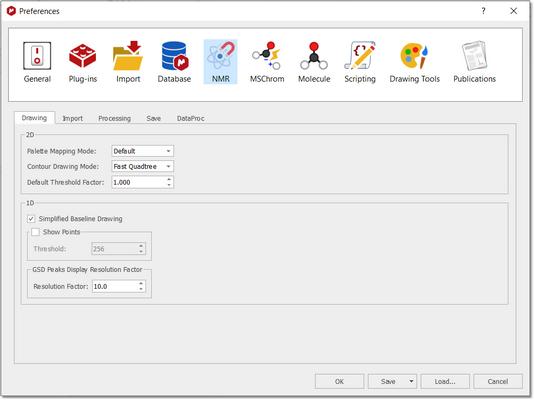
From the 'NMR Preferences' dialog box, you will be able to select the mode of the '2D palette mapping' (default, absolute and dynamic), the contour drawing mode (Fast, Fast Quadtree and High resolution) and the default threshold factor (useful for 2D plots).
The Simplified Baseline Drawing box will draw the baseline of spectra with less noise ("simplified" noise) so they will be plotted faster. It will be useful for stacked plots (of 1D and 2D spectra).
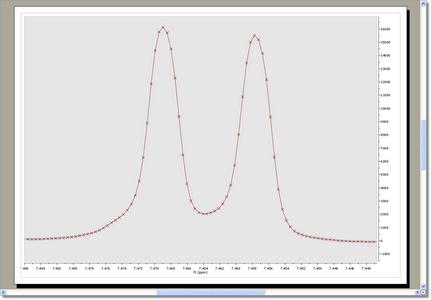
From this dialog box, you will also be able to select threshold of the limit of the number of points showed in the spectral window. For example if your spectral window has less than 128 points (and you have this option checked), you will see the points (as crosses) drawn on it; as you can see in the picture below. If the spectral window has more than 128 points, you will see the spectrum as usual.
From this Preferences menu you can also select the GSD display resolution factor.
The GSD peaks extend over all the spectra but when drawing we are cutting the display at some point to speed up the drawing. By default Mnova uses the peak width by a factor to "cut" the peak display. This behavior is the default one but is optional. The user will be able to change it in the preferences (NMR tab) just by checking "GSD Peaks Display Resolution Factor". And if it's checked you can adjust the factor (10 by default) to be multiplied by the width.
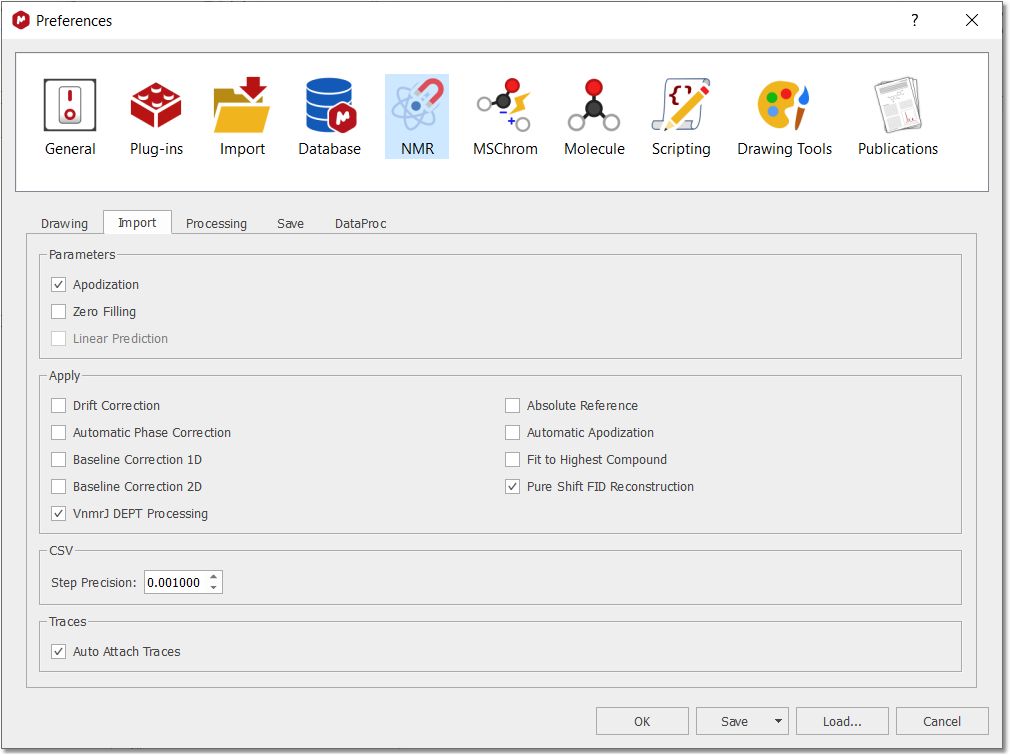
From this menu, but selecting the Import tab, the user can select the option to import the apodization, zero filling, linear prediction options from the spectrometer and also the default phase correction method (Imported or Automatic). From here you can also select to apply automatic baseline corrections, apodization, absolute reference, fit to highest compound, VnmrJ DEPT processing or pureShift FID reconstruction :
Note about Apodization: 1. Import Apodization ON, Apply Automatic Apodization OFF: Mnova tries to import apodization parameters. If no apodization is imported, no other apodization is applied. 2. Import Apodization OFF, Apply Automatic Apodization ON: Mnova applies an automatic apodization to each type of spectra. 3. Import Apodization ON, Apply Automatic Apodization ON: Mnova tries to import the apodization parameters, but if no apodization is imported, automatic apodization is applied. 4. Import Apodization OFF, Apply Automatic Apodization OFF: no apodization is applied in any case.
If the the 'Auto Attach Traces' box is checked; the 1D spectra of the document will be used as projections of a 2D.
Under the 'Processing' tab, you will have a preference to use multiple CPU cores to speed up the 'processing&analysis' of stacked spectra.
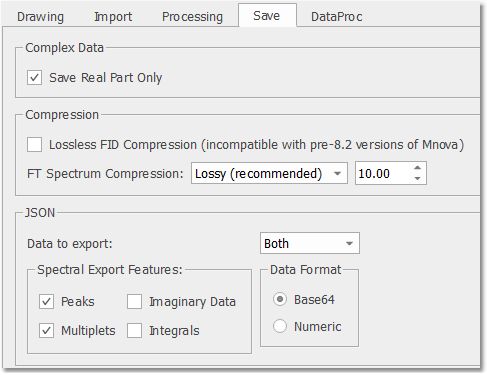
Selecting the 'Save' tab will allow you to compress the data on storing. From this tab you will be also able to select if you want to keep the real part only or both imaginary and real parts when saving an NMR spectrum into an Mnova document.
From the same dialog, you can select the options to export your spectra as .json files (from the 'File/Save As' dialog). You will have the capability to export the FID or the processed spectrum (or both). You can export the peaks, multiplets, integrals and imaginary data in 'Base64' (faster but not human readable) or 'Numeric' (slower but human readable) format.
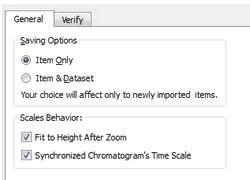
From the 'Mass Preferences', the user will be allowed to select the saving options (item only or item+dataset). When the option 'Synchronized chromatogram's Time Scale' is selected, you will be able to zoom, pan and cut to all showing chromatograms. You will find also an option to fit to height after zoom (selected by default). When this option is checked, a fit to height is applied after making a horizontal zoom in a mass spectrum or a chromatogram. In case of the other zoom modes (vertical or in both dimensions), a fit to height is never applied.
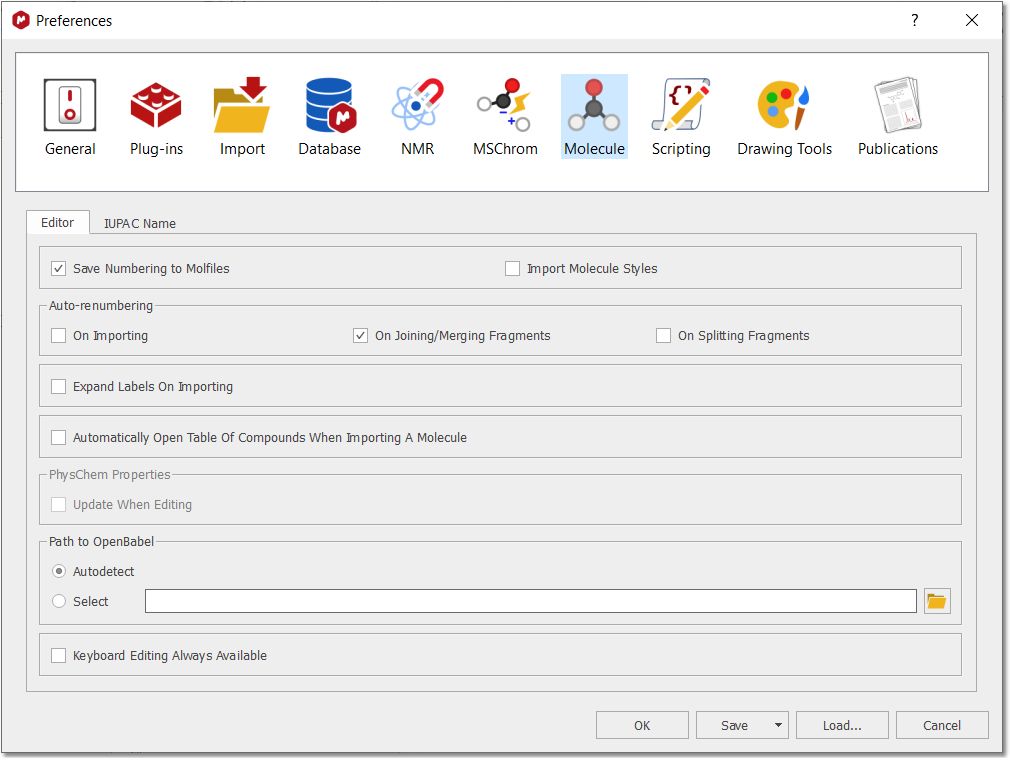
From the 'Molecule Preferences', you will be able to save the numbering when you export the molecule to a .mol file (via File/Save as'), 'import molecule styles' (when you paste special) and auto-renumbering on importing or joining fragments:
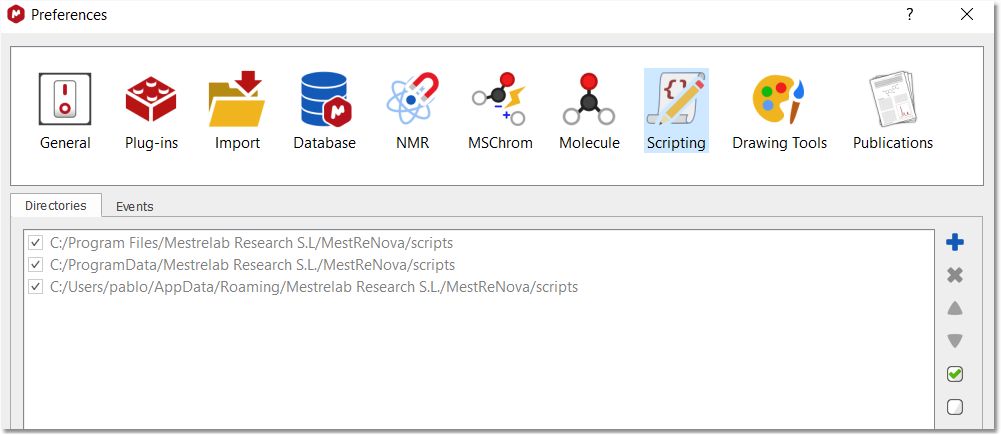
From the 'Scripting Preferences', you will be able to select the scripting folders and also to create events to run script events by default:
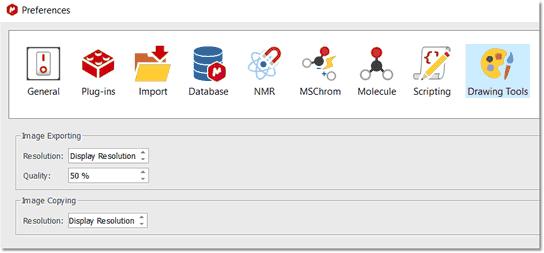
From the 'Drawing Tools Preferences', you will be able to select the exporting 'Resolution' and 'Quality' of the graphics and also the resolution of the image copying:
|