Scripting with Mnova


Scripting with Mnova |
|
|
Benefits and uses
The availability of scripting in Mnova provides opportunities and benefits both for skilled NMR and casual, non-expert users:
•Users are less dependent on the application developers for new features since scripting allows them to implement minor features themselves which can be deployed to less expert users. •NMR administrators can write scripts to customize applications before deploying them to a group of users. For example, an NMR manager could create a script to automate some particular processing which he can distribute among his users in such a way that they will simply have to click one button (e.g. toolbar button) to apply that processing. •Mnova developers can use scripting to prototype new features that can later be incorporated into the next version of the application. This is ideal when a client requires some processing/analysis feature not available in the application and cannot wait until a new version of Mnova is released. •Mnova scripting language is based on an ECMAScript-based language making it easier for existing Web developers to customize and extend Mnova.
In essence, nearly everything that can be done with the Mnova graphical interface (UI) can be reproduced with Mnova's scripting module, making it very easy to automate repetitive tasks. For example, you may have to routinely process 1H NMR spectra using the same processing operations. You can create a script which wraps up all these processing functions in such a way that by simply clicking a toolbar button or pressing a keyboard shortcut, all of your 1H NMR spectra will be processed accordingly. Furthermore, if some particular processing function is not available in Mnova, you can create a script which modifies the spectral data points according to your requirements.
For further information about the scripting documentation, please check the Mnova installation folder at: C:\Program Files\Mestrelab Research S.L\MestReNova\documents\scripts Introducing Mnova Script – Hello World
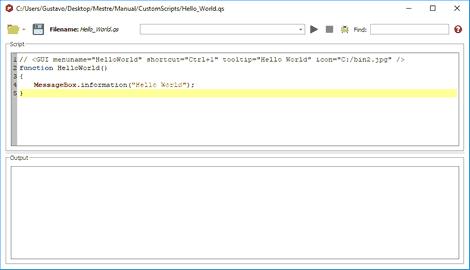
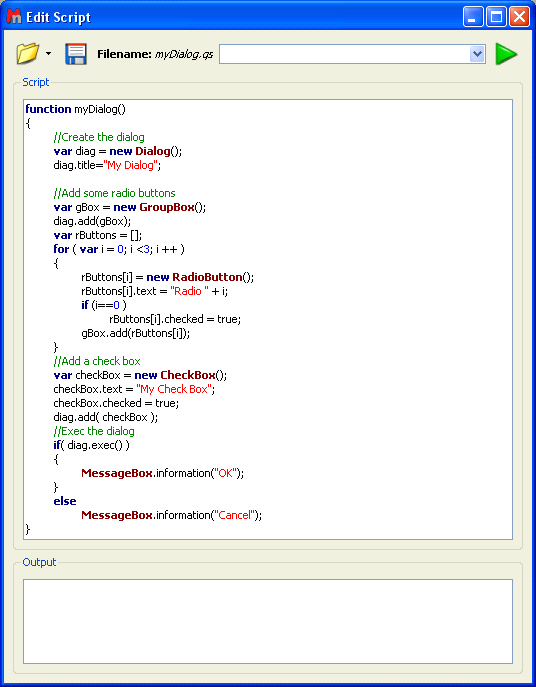
A "hello world" program has become the traditional first program that many books use to introduce a programming language. It will act as a cheatsheet for you until you familiarize yourself with the language. The point of this application is to use all the most commonly used elements of Mnova Script language and putting it in a single place so that you can refer to it later. We will start showing the basic elements of an Mnova script and from that point some more advanced methods will progressively be added. Mnova scripts can be created with any text editor, although Mnova includes a specialized script editor with syntax highlighting and debugging output capabilities. This text editor is available from the Tools/Edit Script menu command. Issue this command and type in the following text:
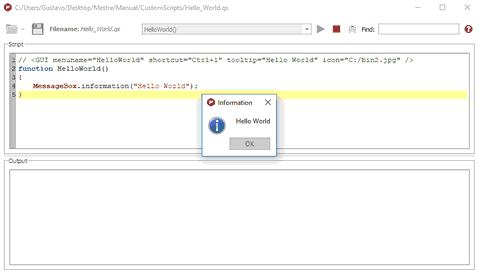
In this example we have defined a function called helloWorld() which will simply display a message box with the text ‘Hello World’. Note that MessageBox is in bold, meaning that Mnova script editor recognizes it as a valid function. Next, go to the edit control at the top of the script editor and type helloWorld(). Do not forget the brackets as they are required by the scripting framework in order to properly interpret the function. Once you have typed it, click on the green arrow at the right side of the edit control. You should get the pop up message box.
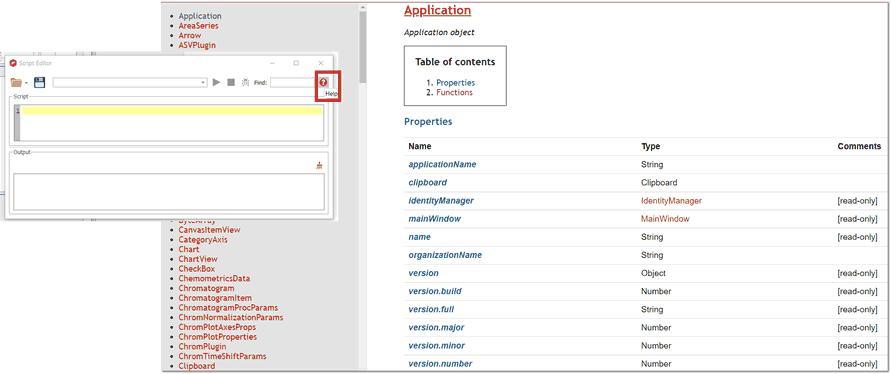
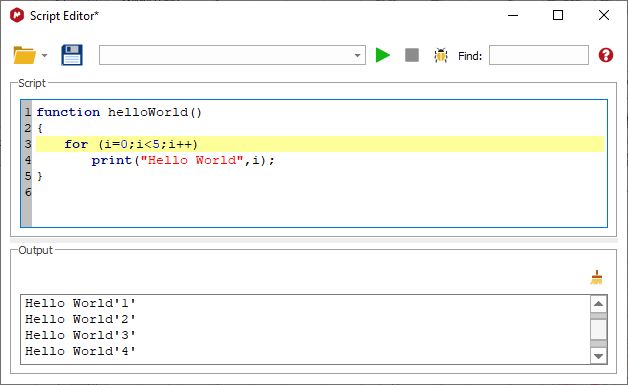
Use the print command to write information directly on the output control in the script dialog. This is very useful when debugging scripts.
Please note that you will be able to load/save any script by using the applicable buttons
As Mnova scripting is an ECMAScript-based language, you can use any of the many functions and statements supported by this standard such as loops, conditions, etc. Remember that JavaScript is ECMAScript based too so if you are familiar with it or with C/C++, writing Mnova scripts should be very easy for you. If you are not familiar with the ECMAScript language, there are several existing tutorials and books that cover this subject, such as JavaScript: The Definitive Guide.
You can also run scripts by following the menu 'Tools/Run Script' (shortcut: Ctrl+Shift+R) and loading the applicable .qs file. Where should the scripts be saved?
In principle you could save your scripts anywhere in your computer. However, it’s strongly recommended to save them in a custom scripts folder, that you can create from the 'File/Preferences/Scripts/Directories' menu (after having clicked on the blue plus button):
Use the red cross button to delete any added directory and the blue arrow buttons to sort the folders.
This is very important to allow Mnova to find these scripts when starting in such a way that they can be added to the GUI of Mnova (e.g. Toolbars, Menus, etc).
For example, type the following script:
// <GUI menuname="HelloWorld" shortcut="Ctrl+1" tooltip="Hello World" icon="C:/bin2.jpg" /> function HelloWorld() { MessageBox.information("Hello World"); }
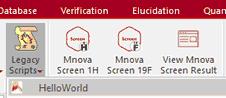
And save it in the scripts directory (program data …). Now close Mnova and open it again. The new script will appear under the 'Tools/Legacy Scripts' button:
You will appreciate that the script is available in the menu bar. The key to get this working lies in the first line of the script (and of course, in the fact that Mnova can locate the script as it has been saved in the appropriate folder):
// <GUI menuname="HelloWorld" shortcut="Ctrl+1" tooltip="Hello World" icon="C:/bin2.jpg" />
This line is used to instruct Mnova about the name to be displayed in the scripts menu along with the keyboard shortcut and the text used as a tooltip. For a full description on the usage of this line, see connecting scripts and Mnova GUI section below.
You can create dialog boxes with controls. The script below shows a simple example.
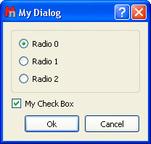
Execution of this script results in the following dialog box:
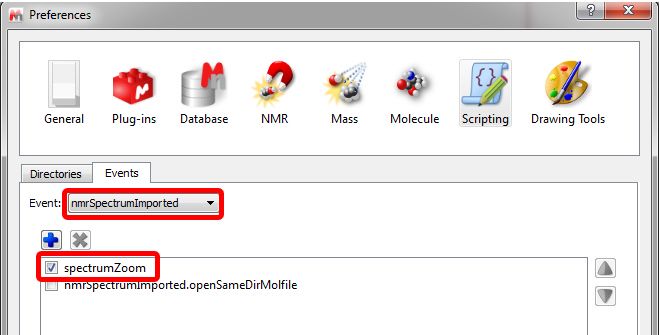
Scripting Events Following the menu ''File/Preferences/Scripts/Directories', you will find an 'Events' label; which will allow you to add any event (which will run by default in Mnova). You will find an example script about it (eventHandlerExample.qs) in the MestReNova examples script installation folder.
For example, imagine that you always want to open your 1D datasets with a specific zoom area. You can create an event to do it. To do it, just save this script in your Scripts directories:
function spectrumZoom(aJSONString) { var info = JSON.parse(aJSONString) var actDoc = mainWindow.activeDocument var spc = new NMRSpectrum(actDoc.getItem(info.itemId)); if( !spc.isValid() ) return false; spc.horzZoom(1.0, 5.0); spc.vertZoom(-100.0,8000.0); /*if( spc.dimCount == 1 ) spc.zoom(3.0, 4.5); else spc.zoom(1.0, 5.0, 1.0, 5.0);*/ //spc.zoom(); spc.update(); mainWindow.activeWindow().update(); return true } Application.mainWindow.installEventHandler("nmrSpectrumImported", "spectrumZoom")
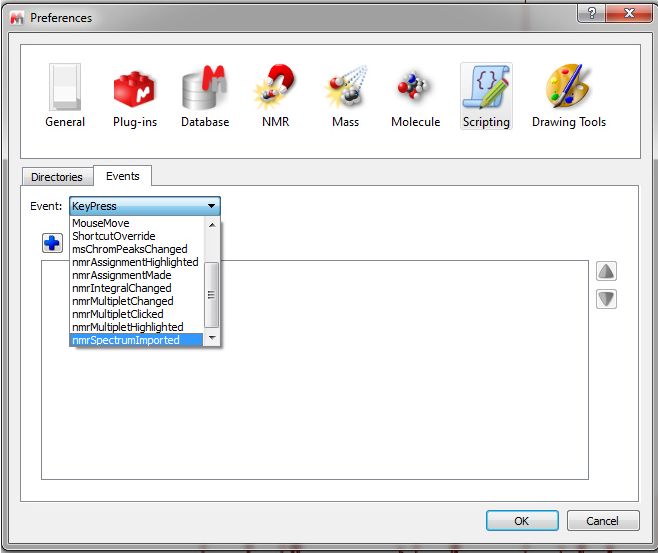
Then restart Mnova and select it (spectrum zoom) as an event in the ‘File/Preferences/Scripts/Events/nmrSpectrumImported’ menu. this will open your 1D-NMR spectra with a spectral window from 1 to 5 ppm
|