Connecting scripts with Mnova objects


Connecting scripts with Mnova objects |
|
|
Simple access to an NMR spectrum The examples we have shown so far are certainly not very useful. The good thing about scripting in Mnova is that it can be used to manipulate objects (e.g. spectra, molecules, pictures, etc) in Mnova and automated repetitive tasks. This section will explain how to access an NMR spectra from within the scripting framework.
Consider the following code snippet:
/*globals Application, File, TextStream*/ /*jslint indent: 4, plusplus: true*/
function dumpSpectrum() { "use strict"; //To get the active spectrum var d, dumpStream, colCount, rowCount, r, c, spec = Application.nmr.activeSpectrum(), dumpFile = new File("C:/mnova/dump.txt");
//The function isValid informs about if the spectrum obtained is correct if (spec.isValid()) { if (dumpFile.open(File.WriteOnly)) { dumpStream = new TextStream(dumpFile); try { //To dump the spectrum information dumpStream.writeln("Solvent:\t", spec.solvent); //To dump information about each dimension for (d = 1; d <= spec.dimCount; d++) { dumpStream.writeln("Dimension:\t", d); dumpStream.writeln("Frequency:\t", spec.frequency()); dumpStream.writeln("Lowest Frequency:\t", spec.hz()); dumpStream.writeln("Nucleus:\t", spec.nucleus(d)); dumpStream.writeln("Spectral Size:\t", spec.count(d)); } //To dump the values of the spectral points if (spec.dimCount === 1) { rowCount = spec.count(); for (r = 0; r < rowCount; r++) { dumpStream.writeln(spec.real(r), "\t", spec.imag(r)); } } else if (spec.dimCount === 2) { colCount = spec.count(1); rowCount = spec.count(2); for (r = 0; r < rowCount; r++) { for (c = 0; c < colCount; c++) { dumpStream.write(spec.real(r, c)); if (c < colCount - 1) { dumpStream.write("\t"); } } dumpStream.writeln(); } } } finally { dumpFile.close(); } } } }
The first thing to note is the nmr object. This object gives access to the NMR plug-in framework and as such it allows you to get access to the NMR spectra in Mnova. For example, spec = Application.nmr.activeSpectrum()function makes it possible to select current active spectrum in Mnova. From that point, you can read relevant information of the NMR spectrum such as the number of points, spectral width, etc.
Let’s now move to a more comprehensive example which will illustrate, step by step, how to access all objects within an Mnova page. Having access to multiple objects: the layout script
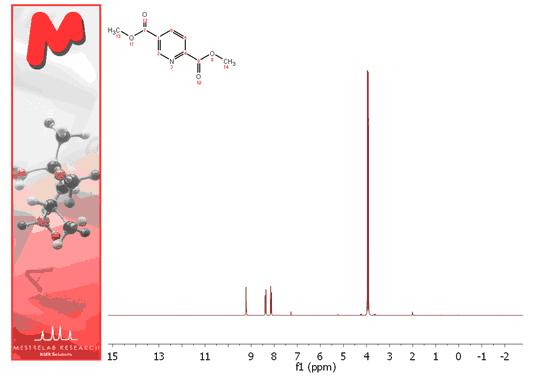
As an illustrative example, we will build a script which will make it possible to organize different objects contained within a page. This script will be called layout for obvious reasons. To start off with, open a spectrum, a molecule and a picture (which could be, for example, your company logo). The following picture shows the initial conditions for this example:
The goal here will be to create a script which will arrange these 3 objects in such a way that the picture will be located at the left side of the page whilst the spectrum and the molecule will be moved next to the picture.
// <GUI menuname="Layout"shortcut="Ctrl+2" tooltip="Layout" /> function layout() {
var i, item, width, height, w = mainWindow.activeWindow(), p = w.curPage(), n = p.itemCount();
for(i = 0; i < n; i++) {
item = p.item(i); width = item.width; height = item.height;
switch(item.name) { case "NMR Spectrum": item.left = p.left + 50; item.right = p.right - 10; item.top = p.top + 20; item.bottom = p.bottom; break;
case "Molecule": item.left = p.left + 50; item.right = item.left + width; item.top = p.top; item.bottom = p.top + height; break;
case "Image": item.left = p.left; item.right = item.left + width; item.top = p.top; item.bottom = item.top + height; break; } } w.update(); }
Every object in Mnova is contained in a page which in turn is contained in a document. So the first thing we should get access to is the document. This is done in this line:
w = mainWindow.activeWindow(),
Basically we access to the document window via the Application object. Once we have the document, we can easily access to the currently active page through Page object like this:
p = w.curPage(),
Now we are ready to navigate through all the objects contained in this page. For every object, the exact type is checked within the switch command and then the objects are repositioned accordingly. This is the result for this example.
Tuning up the layout script
We will now modify the layout script in order to achieve the following two objectives: 1.Load the image from a file 2.Show the spectrum title automatically on the page when the script is executed
First off, we will show how to load an image from the disk. To do that, you have to use the serialization object. For example, assuming that the image is located in c:/mnova/logo.png, you can use this code:
serialization.open("c:/mnova/logo.png");
Next thing is how to show some parameters (Spectral Width, Solvent, Nucleus) on the page. In order to do that, it will be necessary to create a specialized NMR spectrum object rather than using the default properties available in every item object. See the following code snippet:
"<b>Frequency (MHz): </b> {0}<br/>\ <b>Spectral Width (Hz): </b> {1}<br/>\ <b>Solvent: </b> {2}<br/>\ <b>Nucleus: </b> {3}".format(specItem.frequency().toFixed(4), specItem.scaleWidth().toFixed(2), specItem.solvent, specItem.nucleus()), true );
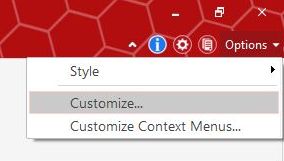
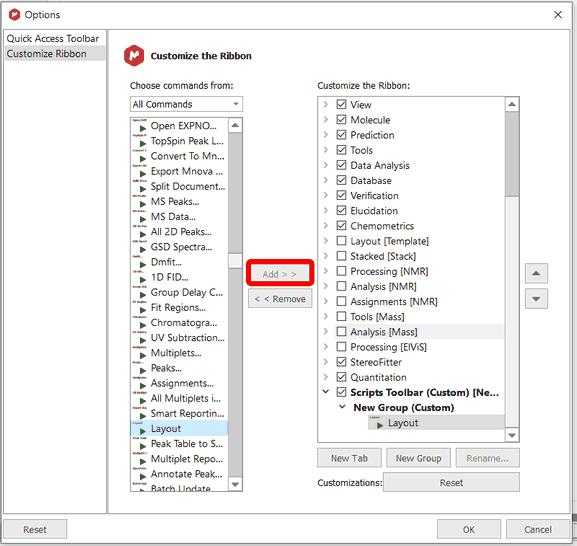
Once you have the script saved (please bear in mind that the script file will need to have the same name as the function which you want to call, in this case the name of the script must be ‘layout2.qs’) in the Mnova scripts folder (and then have restarted the program), you will be able to add it to the toolbar just by following the menu: 'Options/Customize'.
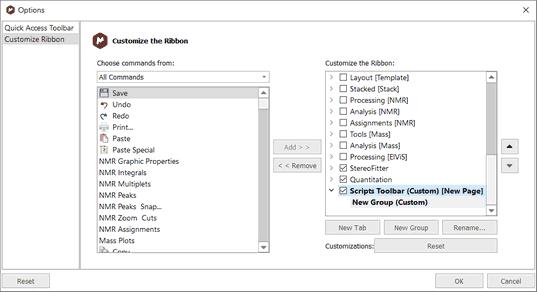
This will display the 'Customize Toolbars' dialog box. Then, click on the ‘New Tab’ button to create a new toolbar and change its name (Scripts Toolbar) by clicking on the ‘Rename’ button.
Next, navigate to the 'Script' icon (Layout) in the 'Commands' menu (at the left-hand side of the window) and Click on the 'Add' button to add the 'Layout’ script to the 'New Group' of the Scripts Toolbar.
Finally, click on OK and you will be able to see the 'Layout' icon in the 'New toolbar'.
You will also be able to introduce the script in any existing contextual menu by following a similar procedure in the ‘Customize Context menus’ dialog box.
Custom NMR Processing
There are two ways to process NMR spectra via scripting: 1.By means of Processing Templates 2.By using the Processing interface
1 Processing templates
Mnova is able to process a 1D or 2D NMR spectrum via scripting by using the processing templates (generated with the Full Processing feature). As you can see in the below example, you can process (with an easy script) any kind of spectrum (1H, 13C, 1D or 2D). You only need to create the processing template for each experiment. In the example below we have created 3 different processing templates, one for the processing of 1H-NMR spectra (1H.mnp), the second for the processing of 13C-NMR spectra (13C.mnp) and the last one for the processing of COSY spectra (COSY.mnp). As you can see in the scripts, the three the templates were saved at c:/mnova/ (of course you can change this path and also the name of the template files).
/*globals Application*/ /*jslint indent: 4*/
function procTemplate() { "use strict"; var procFileName, spec = Application.nmr.activeSpectrum();
if (!spec.isValid()) { return; } if (spec.dimCount === 1) { if (spec.nucleus() === "1H") { procFileName = "c:/mnova/1H.mnp"; } else if (spec.nucleus() === "13C") { procFileName = "c:/mnova/13C.mnp"; } } else if (spec.dimCount === 2) { if (spec.nucleus(1) === "1H" && spec.nucleus(2) === "1H") { procFileName = "c:/mnova/COSY.mnp"; } } if (procFileName) { Application.nmr.processSpectrum(spec, procFileName); } }
2 Processing interface
The Processing interface makes it possible to change or apply any processing operation available in Mnova. For example, let’s make a simple script which will set an exponential weighting function:
/*globals Application*/ /*jslint indent: 4*/
function myProcess() { "use strict"; var spec = Application.nmr.activeSpectrum(), p = spec.proc; p.setParameter("Apodization[1].Apply", true); p.setParameter("Apodization[1].Exp.Apply", true); p.setParameter("Apodization[1].Exp.Value", 0.5); spec.process(p); Application.mainWindow.activeDocument.update(); }
After creating a spectrum object which represents current active spectrum, we create a processing variable (p) which represents the processing operations for that particular spectrum. Once this new object is created, we can read or change its values using getParameter and setParameter functions. For instance, in this example we first set to true the Apodization property (otherwise no apodization will be applied) and then, after setting to true the exponential function, we set the line broadening to 0.5 Hz. Finally, when we are done, we assign this processing object to the spectrum object (p = spec.proc;) and we call spec.process(); to actually apply all the processing operations.
NOTE: For further information about the scripting documentation, please check the Mnova installation folder at: C:\Program Files\Mestrelab Research S.L\MestReNova\documents\scripts |