Verification in batch mode


Verification in batch mode |
|
|
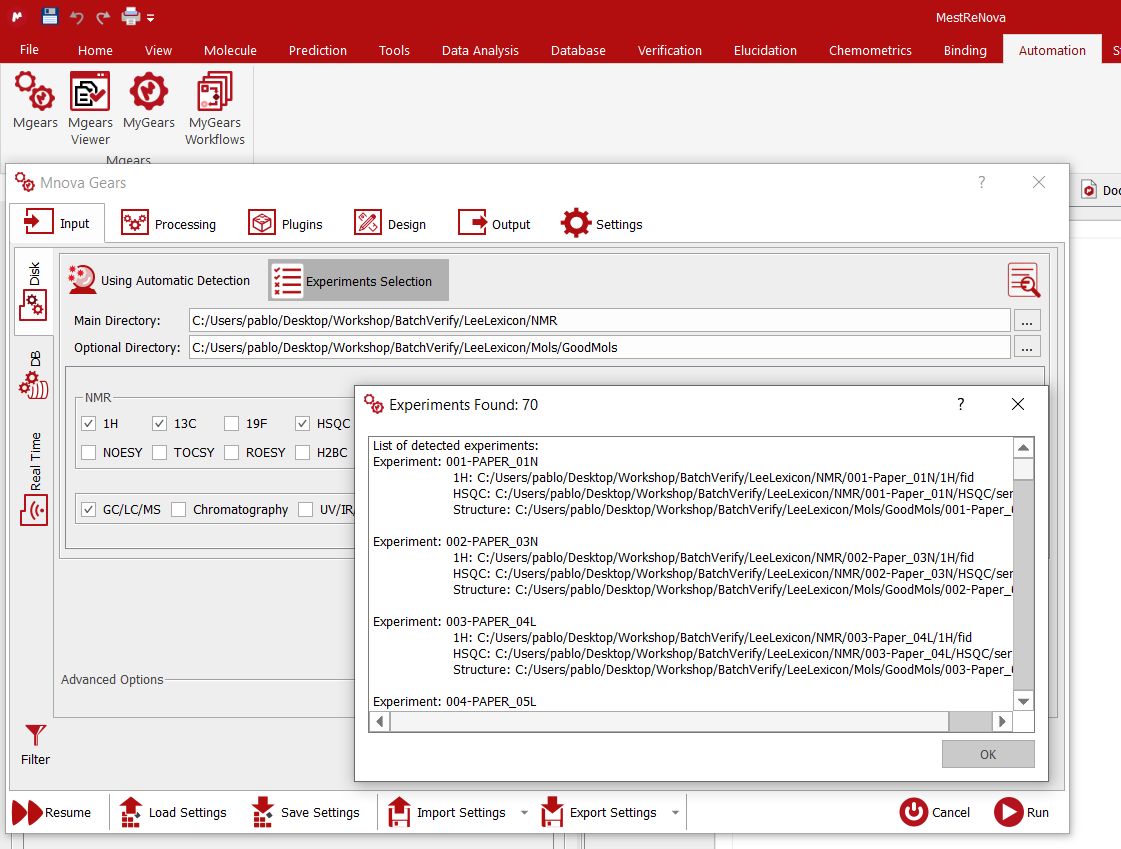
Mnova Batch Verify evaluates analytical data and makes a judgment as to whether they are compatible with the structures proposed by the user in full automation mode (from libraries or at the point of data acquisition by using the Listener). This plugin is sold apart and an specific license is needed. You will need to install Mgears and the Batch Verify brick by following the menu 'File/Advanced Plugins' and clicking on the 'blue plus' button or just by dragging&dropping the XML file in Mnova With this plugin licensed, you can run verifications in Mnova in batch mode by following the menu 'Automation/Mgears'. From Input/Disk tab, you will be able to select the file locations in your hard disk (for your datasets and molecules). Clicking on the 'Automatic Inspection' button will check the datasets included in the Base Directory:
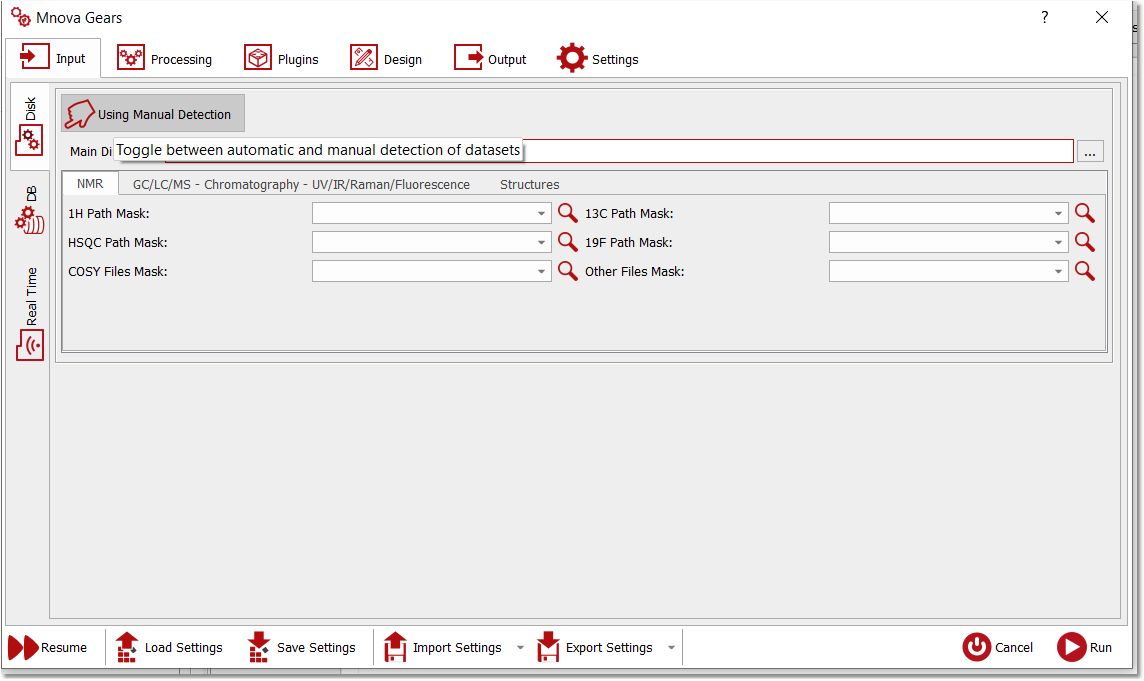
If you click on the 'Toggle' button, you could select the masks for the spectra and molecules (instead of an automatic detection):
Mask: Should you desire to use 1H spectra as part of the verification, a file mask describing how to open each of the spectra must be entered here. All Operating System standard conventions apply (*, ?, !, etc.).
The scroll down menu of the Masks will hold the last 5 used masks. Please bear in mind that you can use more than one mask at a time by separating the masks with the character |. This separator will be inserted automatically if the mask is chosen from the list.
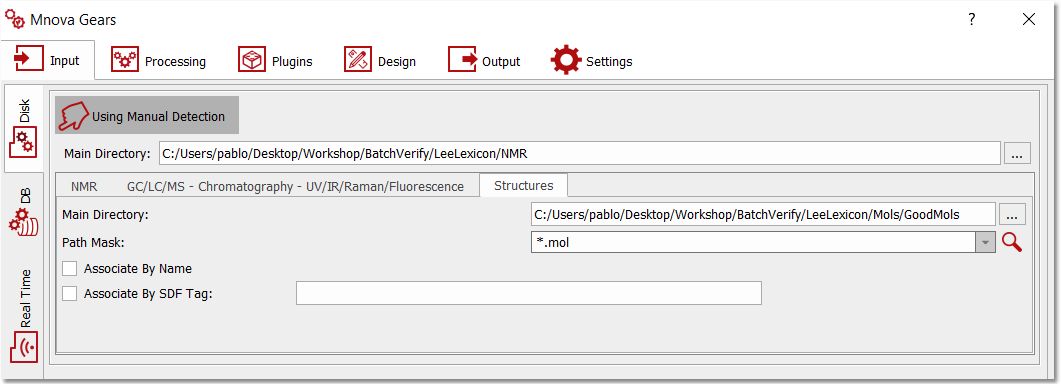
The same can be done for the molecules:
Main Directory: The location of the .mol (or .sdf) files to verify against can be entered here, as well as the File Mask to each one of the individual files.
The automation has the options to run spectra and molecules with the same name (therefore user should rename the mol or sdf files to the same name as the spectra) or in the same order (in which case user should make sure that the spectra and the molfiles are in the same order in their respective locations). If you are working directly with Mnova documents (instead of raw data) containing the molecular structure inside, you will not need to fill the molecule file location.
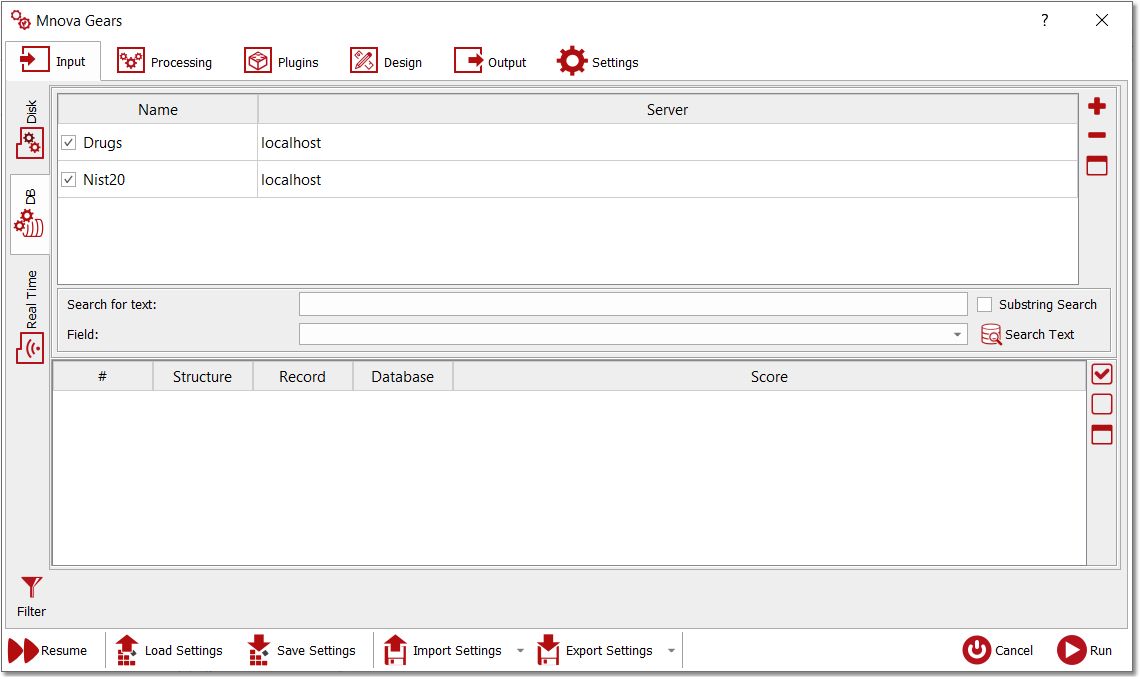
Selecting the Database tab will allow you to choose the input from existing Mnova databases:
You can also run Batch Verifications as a listener. Mnova can ´listen´ to a series of folders or drives and can grab data as is acquired and saved, and run the verification analysis automatically, saving the result in the selected folder. The settings for the Verify listener can be selected under the 'Real Time' tab:
In that case, you will need to select the path of the datasets folder (and click on the 'red plus button' to add it to the list of 'Listened Folders'), the experiment types that you want to import and the path folder of the molecules. Please bear in mind that if you only use one listened folder; the name of each spectral folder must be the same with the name of the applicable molecule file and the molecules folder must be loaded previously in the listener folder (before running the listener).
If you select a specific listener folder for the spectra and another for molecules; then molecules and spectra will get grouped according to the name of the mol files and the first level folder where the spectra are transferred.
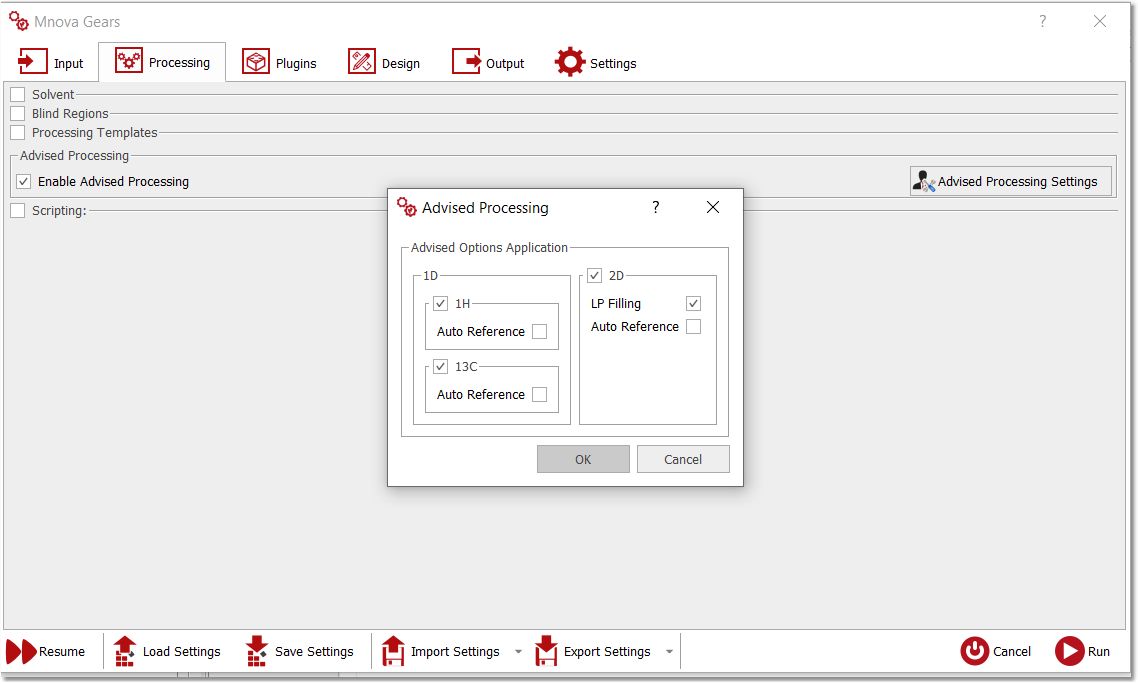
From the 'Processing' tab, you could replace the default solvent (this allows you to handle situations in which the solvent may be wrong in the parameters), add blind regions, use processing templates or enable your Advised processing settings:
Checking the scripting box will allow you to run a script when the automation is started (starting script) or a script to be executed once per dataset after having opened it.
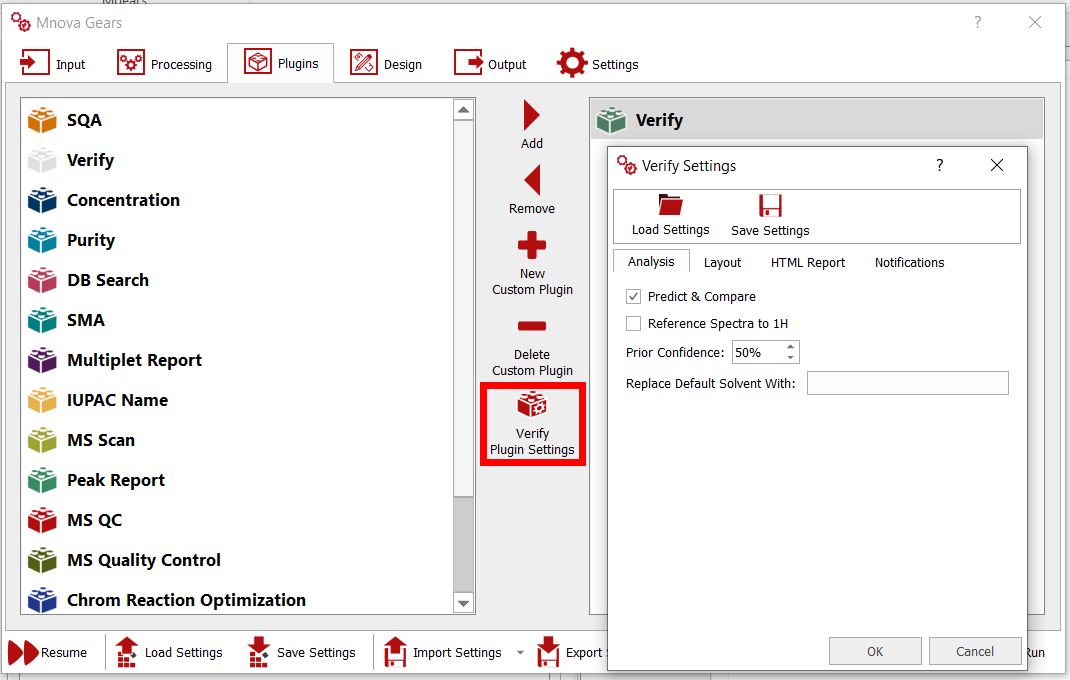
Under the Plugins tab, you could select your Verification settings for the analysis, select layout templates and customize your reports and notifications:
Predict&Compare: as with the single mode verification, this just sets the way in which the data are presented to the user after the verification has been completed. If the option is selected, the user will be presented with a stack of the experimental and the predicted 1H spectrum, if the option is unselected the user will get presented with just the experimental spectrum.
Reference Spectra to 1H: You can Absolute Reference the spectra to the 1H-NMR spectrum
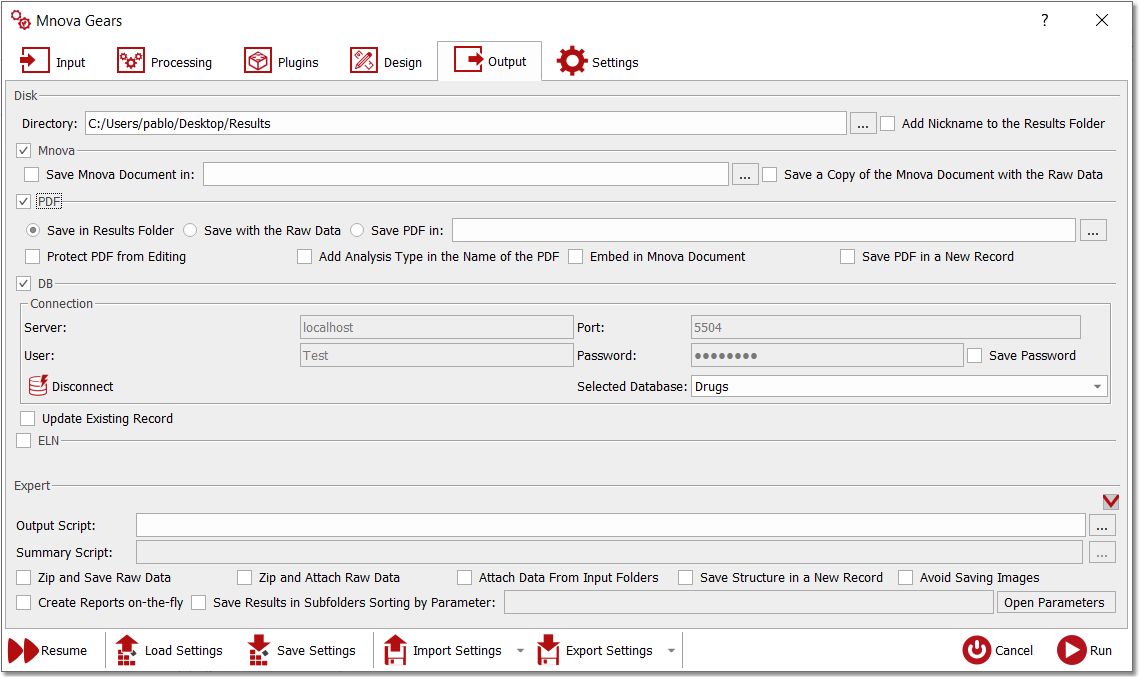
Prior Confidence: If the prior probability is 50%, that means that we don't have any prior knowledge about the quality of our structures so that the new score will be exactly the same as if the prior probability concept is not applied. Replace Default Solvent With: This allows users to handle situations in which the solvent may be wrong in the parameters. It can be the case that a certain batch has been run on a specific solvent but that the user left the default solvent on the spectrometer data entry and therefore the solvent could be wrongly entered. Since the target solvents will affect the performance of the Autoedit function in Mnova Verify, it is important to be able to correct for this at the script level. The Design tab will allow you to use a Layout template, whilst the Output tab will be used to select the folder containing your results (with the option to save them as Mnova documents, PDF, or to an existing Database):
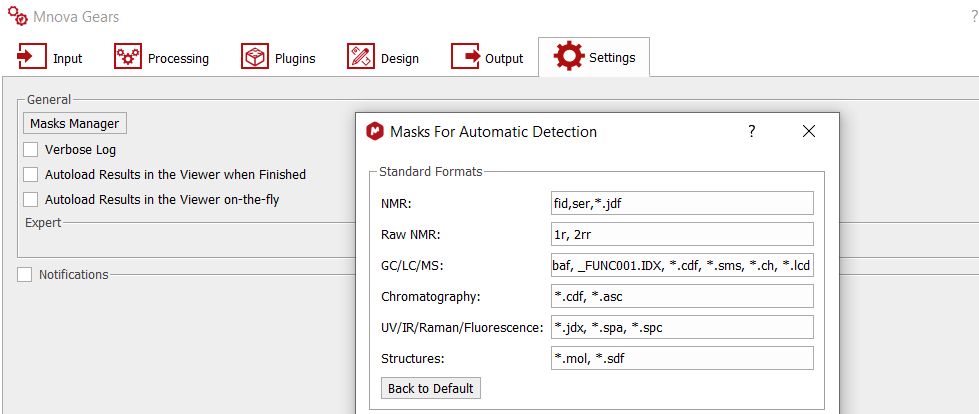
The settings tab will be useful to select the masks for the automatic detections of your input (datasets and molecules):
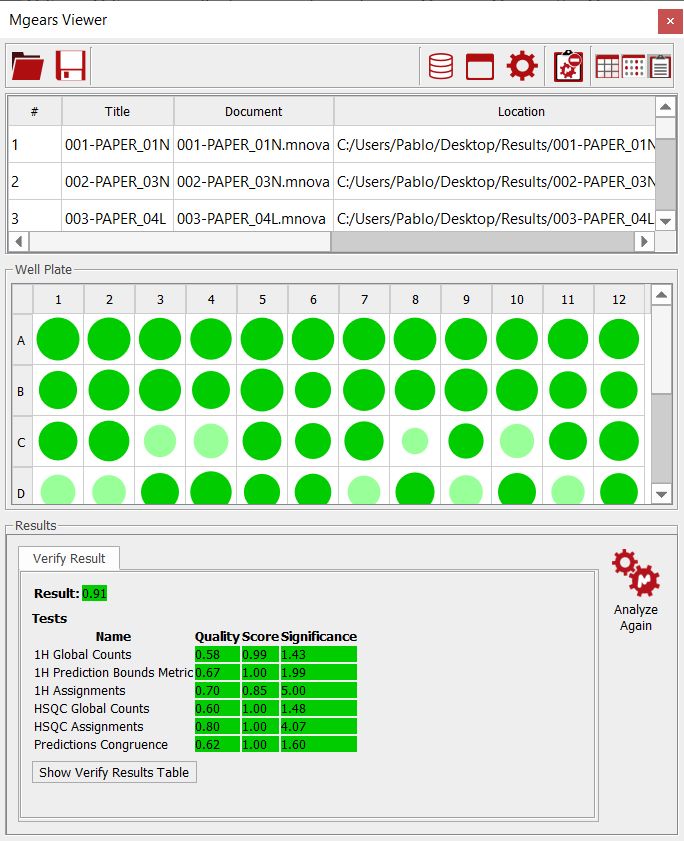
Once the analysis has done the Mgears Viewer can be used to check the results. You would need to navigate to the “results” directory and select the 'data' subfolder”:
Clicking on each row or well plate, will load the dataset in Mnova to allow you to make changes if necessary. The changes made in the Mnova document will be automatically updated in the Viewer.
From the viewer, you can load/save/clear, copy the report to the clipboard (by default) and save to the results to your Database.
Mgears Verify will also generate a log file with some basic information about the verification that has been run (time it was run, number of datasets, etc.), the Mgears settings used for the verification and a summary html file which can be opened in any web browser and which will contain a table showing all the verification results for all the sets.
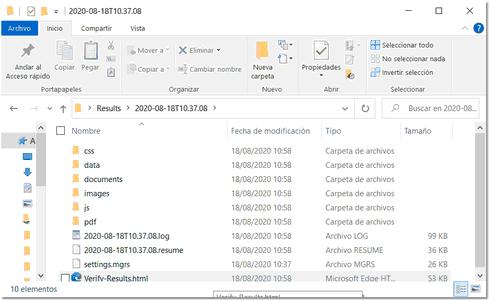
In the documents subfolder, you will have the Mnova documents to allow you to interrogate the data further or look at the detail behind, for example, unexpected failures.
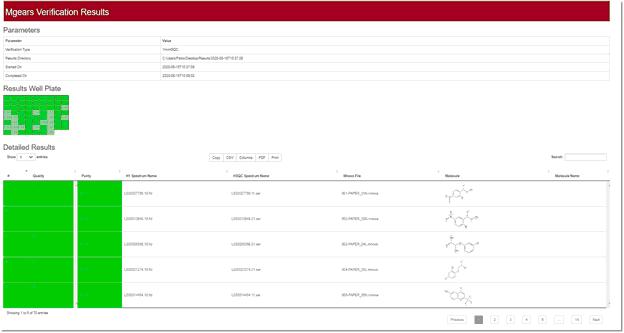
For results interrogation and to gain understanding of the results, user should open the ´result´ html file, with any web browser. This file will present, in one single view: •Some basic verification parameters (time run, type of data) •A well plate with the summary results for all datasets •An extended table with the final result for each dataset as well as all the individual test results for each individual dataset •Links to the .mnova, .csv and .pdf files generated, as well as to original files (fid, mol, etc.) to allow user to quickly drill into specific results which need to be check or looked at further.
|